Homemade collapsible campus board build
Like many of you I have felt the repeated closure of gyms this year frustrating for a whole variety of reasons! Not least of which the worry that I was going to lose all the precious finger strength I had spent the preceding months and years developing. As such my first port of call was to purchase a portable fingerboard which I could hang off my pull up bar at home. While a simple finger board is all good and well, I have of late found myself longing for something a little bit more sturdy. This, mixed with the intense boredom of lockdown 3 and the dark evenings meaning outside climbing was a no-go, led me to deciding to give building my own campus board a go.
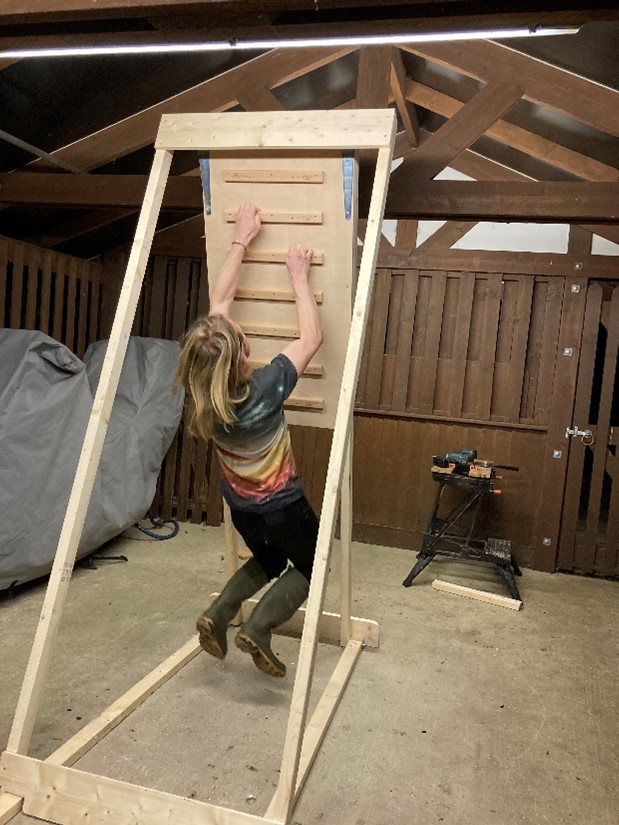
Firstly, I would like to thank my good bloc climbing buddy Alessandro Masullo for the inspiration for this build. Without him having documented the building of his over Instagram I don’t think I’d have been motivated to try and build my own. To begin with my aims were to build something that was collapsible and portable, so it could be stored inside and out of the way when not in use, yet still big and sturdy enough to be able to withstand having a full grown hanging off it on a regular basis. As such, I decided to use legs with a 38x63mm cross section, along with a hinge set up. This gave me the strength I wanted, which also meant the board was only about 15 cm wide when folded away.
Below I have laid out a step-by-step guide to make one of these if anyone fancies having a try, at the very least giving it a go could be a good distraction from the crushing boredom of lockdown.
Step 1- Shopping: I bought everything except the rungs from Wickes, but you could probably pick it up from a lot of different places.
Studwork 38x63mmx2.4m x 6 (£3.25 each)
Whitewood PSE 18x144mmx1.8m x 2 (~£7 each)
T Hinge medium duty (350 mm) x 2 (~£6 each)
Hardwood Plywood 18x606x1220mm (£16)
Nord Climbing Campus Rung x 7 (~£10 each). Seven of these just about fit on the board, although you could easily use less. The advantage of these rungs is that they are different widths on either side if you want to make things harder.
Assorted screws and bolts.
Total: ~£130
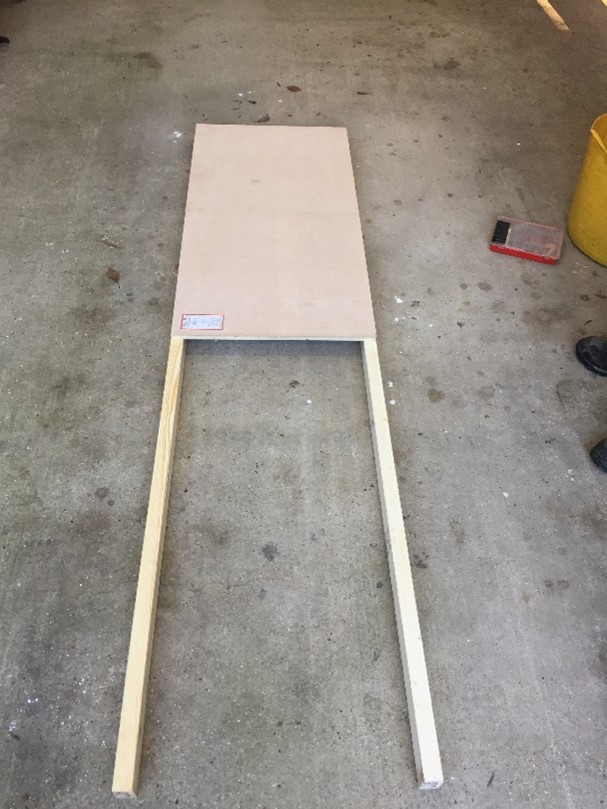
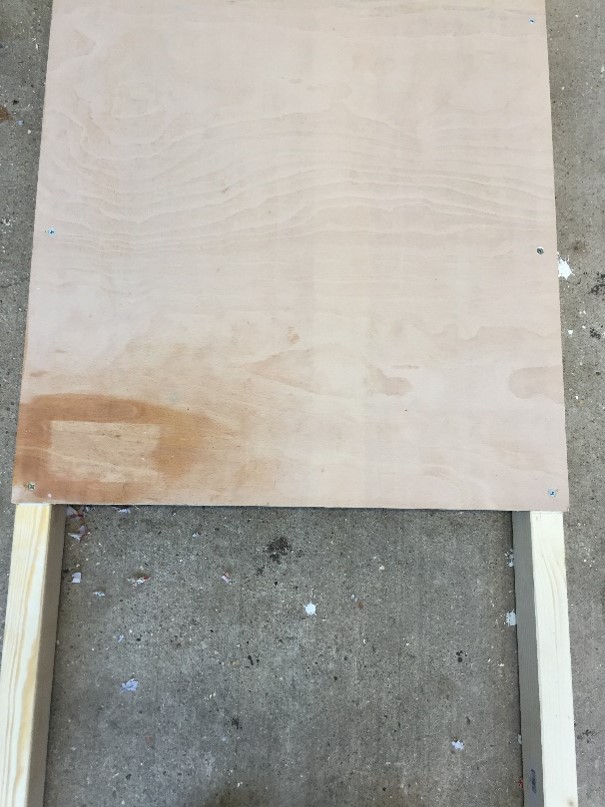
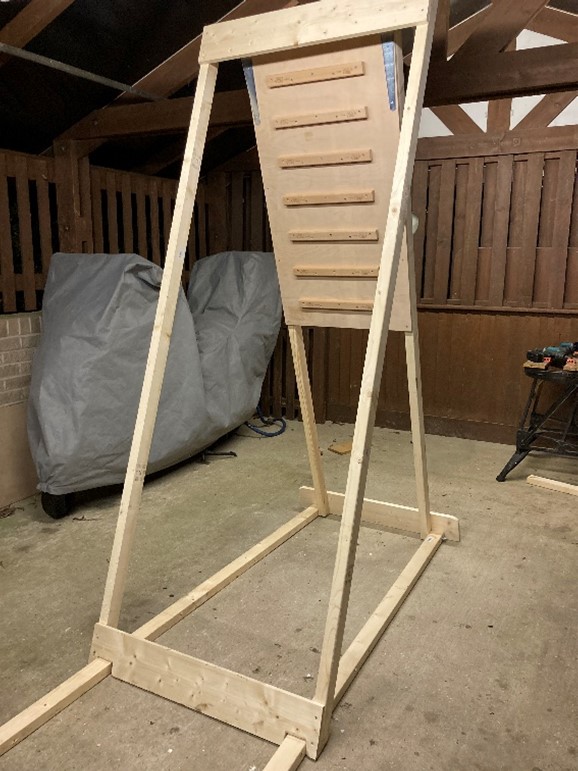
Step 2- Building: Lay two of the legs down on the ground length ways, apply wood glue to the legs and then lie the plywood board on top. Screw in with 5 screws down each side (make sure the screws are going into the centre of the legs)
Step 3- Lay two more of the legs on the ground length ways 90 cm apart. Cut the wide whitewood pieces to size, apply wood glue and screw down into the legs as well. This part is ~30 cm wider than the section with the board attached, allowing this to fit around the board and thus making it flatter when folded away.

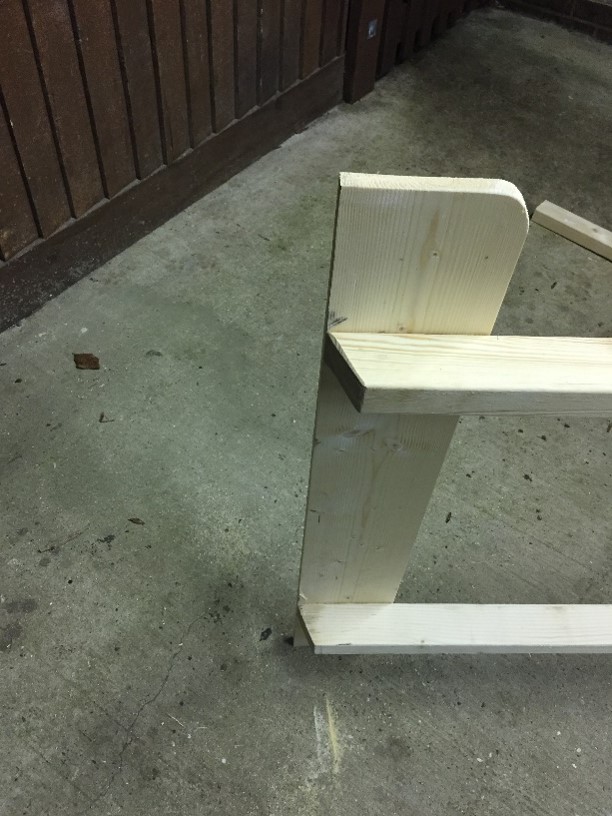
Step 4: Cut a 90 cm foot for the bottom of the legs on the board side. This will just give the whole build a lot more stability. Apply wood glue and then screw into place. I also rounded off the edges of this foot with a saw, just so it was less sharp in case I happened to fall on it.

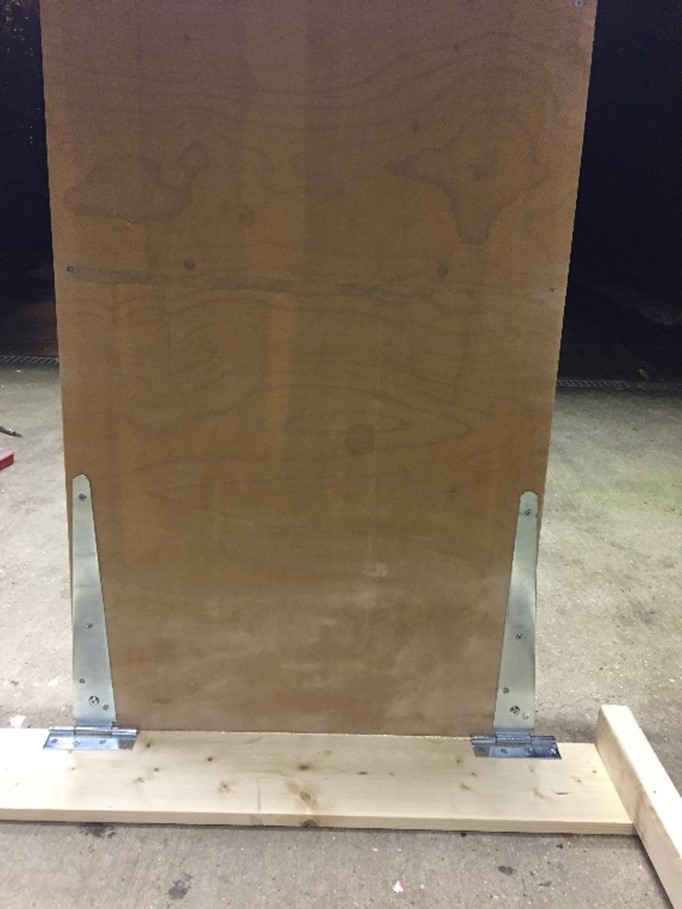
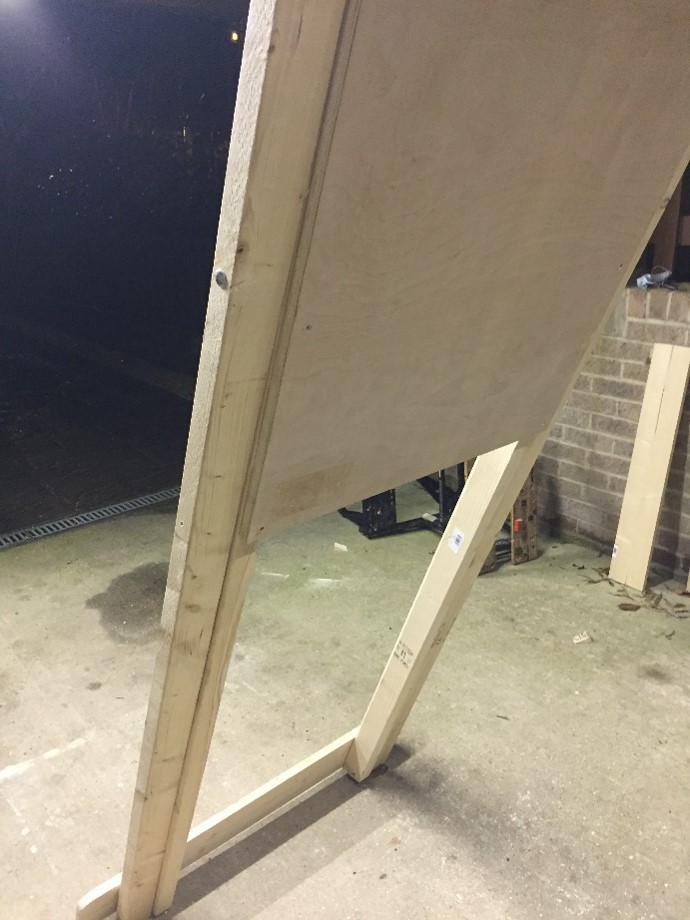
Step 5: Attach the hinges. Secure the shorter part of the hinges to the wide crossbeam at the top of the frame and then attach the long section to either side of the plywood board. The frame should now be able to stand up on its own.
Step 7: Angle the ends of all the feet. As the legs will not be vertical when in use it will help to angle the ends of them to correspond with whatever angle you feel you are going to use the most (this will likely be between 10 and 15o.
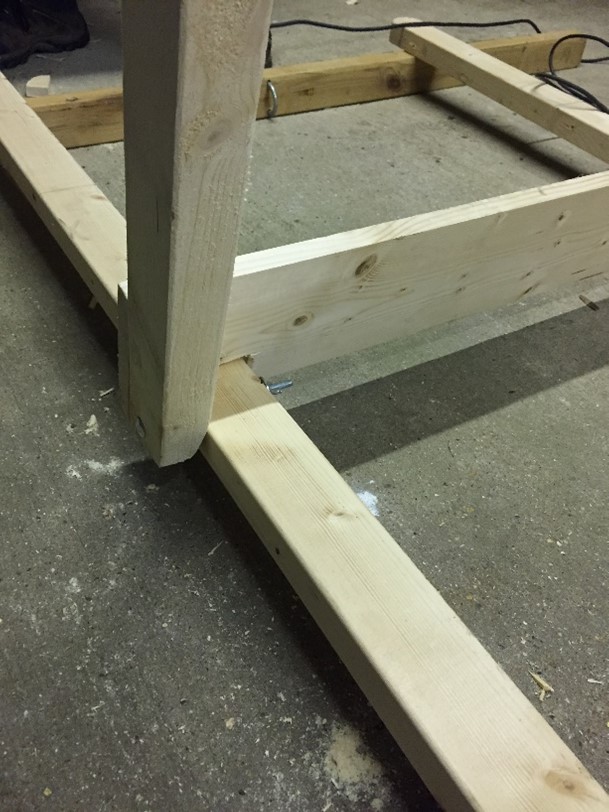
Step 8: Find a way to secure the frame when in use. Different builds use different methods for this, such as a chain or a rope on the side of the frame. However, we decided to use hinged wooden beams as we found this gave the most overall strength and stopped the frame from walking in as well as walking out. So that’s what I’ll describe how to build below.
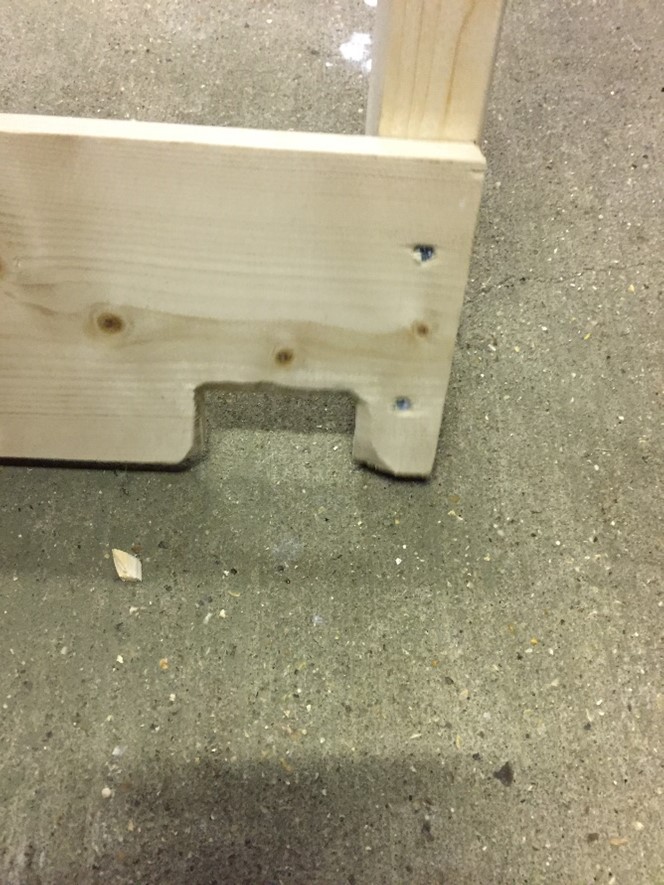
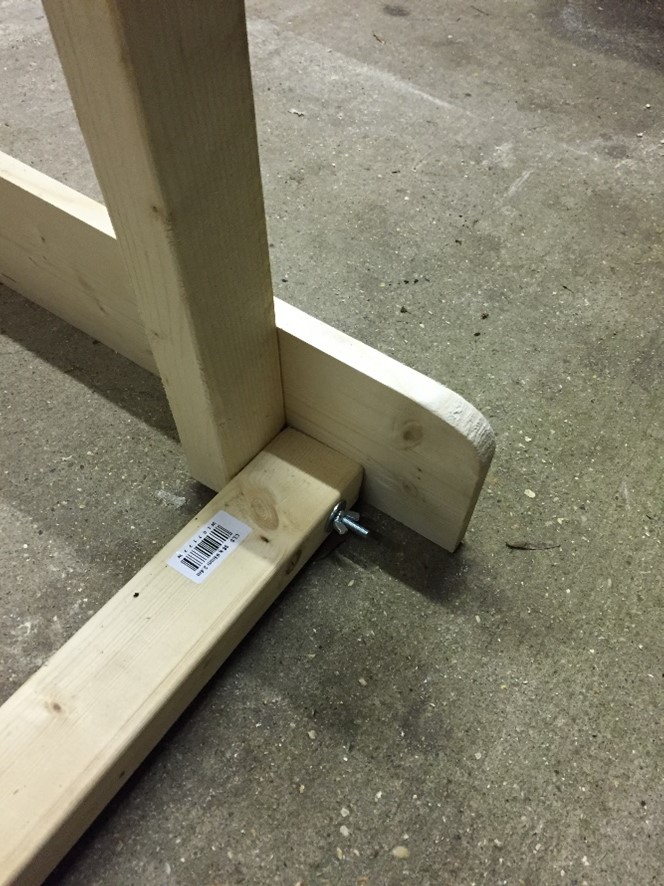
Firstly, cut a section out of the foot opposite to the board for the wooden beams to slide though. Secure these beams with a bolt to the bottom of the feet on the same side as the plywood board. The use of a bolt and wing nut here allows the beams to hinge and means they can be tucked away when not in use.
Step 9: Mark on the bottom beams the distance the frame is on it to get your desired campus board angle (I chose 3 angles of 10o, 15o and 20o as this seemed to cover most of the common angles used in other builds online)
Step 10: Drill a wide hole through both the bottom of the leg and the beam at these distances. Make sure the size of this hole is bigger than the bolts you’re using, this way they can slide in and out easily making changing the angle quicker.

Step 11: Drill a hole in the legs next to the board so that when the legs swing up out of the way you can bolt them in place so they don’t fall down and smack you in the face.
Step 12: The campus rungs: given the board is 122 cm long and I had 7 rungs I put these on 15 cm apart. This gave me a bit of room at both the top and bottom of the board (as too close to the bottom and you’re a bit close to the ground and too close to the top and the hinges get in the way. Make sure they are perfectly parallel and horizontal when you screw them in, otherwise they’ll be a lot harder to hold!

And ta da! You’re finished, enjoy campusing your way to dench fingers which you’ll be able to show off when all of the gyms reopen! I accept that the instructions here may be slightly confusing at points, so if anyone has any questions feel free to drop me a message! Happy climbing

 Next Post